Star News


We make delicious goat cheese at home. goat cheese at home goat milk make cheese at home
- 2 liters of fresh goat milk;
- 1 teaspoon of citric acid;
- 1/2 teaspoon of fine kitchen salt;
- 1 st. teaspoon finely chopped herbs (optional)
Cooking process:
To begin, mix 1 teaspoon of citric acid with a quarter cup of water.
Stir until the acid is completely dissolved.
 Heat the milk in a saucepan over medium heat to about 88g. C. (check with a thermometer).
 Reduce the heat to a minimum and pour the citric acid solution into the milk. Mix thoroughly.
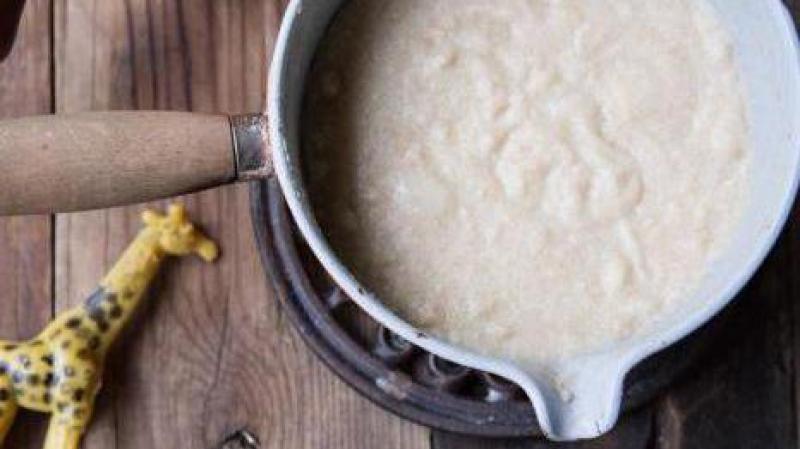
 Heat the pan over low heat for one minute, keeping the temperature no more than 90 degrees C. You will almost immediately see how the milk curdles. Don't bring it to a boil!
Remove the saucepan from the heat, cover with a lid. Let it stand for 10-15 minutes.
 Prepare a colander by placing it over a wide bowl. Line a colander with a piece of gauze folded several times. Strain the cottage cheese through cheesecloth. Collect whey from milk - this is a kind, also a very useful product. Don't throw it away!
 After the curd sits in a colander for 5-10 minutes, gently toss it with 1/2 teaspoon of fine salt (not iodized!). Taste to your taste and add more salt if needed.
 Separate half of the resulting curd mass and add fresh chopped parsley (or other greens, for example green onion, dill, or coriander). I divided the goat curd into two parts, and added chopped onion to one half.
 Squeeze out the remaining moisture through cheesecloth (do not be zealous! Goat cheese should turn out soft). Place it in plastic molds or wrap it in a wax paper roll. Put it in the refrigerator for a couple of hours, where it will acquire its final elastic consistency.
 Serve homemade goat cheese with herbs with vegetable salad.
Pure cheese without additives is very good with honey and a cup of coffee, with white bread and butter - as you like.
Enjoy your meal!
Article read: 14934 times 12.03.2019
How to make cheese at home from goat milk: a simple recipe for beginners
Stanislav Frolov 2019-03-12 2019-10-14 
Goat cheese - real treasure useful trace elements: calcium, magnesium, potassium, phosphorus, iron, zinc, copper and manganese. This product strengthens the skeletal system of the body, improves digestion, skin condition, and serves as a source of prevention from cardiovascular diseases. In addition, it is hypoallergenic and contains few calories.
Today we will tell you how to cook this wonderful product on your own right at home.
Today we will tell you how to cook healthy and tasty goat cheese at home. Don't be scared - it's actually quite simple. The main thing is to follow the recipe exactly.
For those who prefer to watch rather than read, we have prepared. In it, we tried to clearly show how to make delicious goat cheese at home.
For everyone else, we attach step by step recipe goat cheese below.
Goat milk cheese at home for beginners
For the preparation of cheese, we will use the Fansel cheese factory. In general, you can get by with an ordinary volumetric pan, but the risk of spoiling the product in it is much higher. The cheese factory is much safer and more convenient, and there are several reasons for this:
- The cheese factory has a "water jacket" that allows the milk to be heated more evenly and gently. Precise observance of temperature pauses when cooking cheese is the key to success.
- The dairy is equipped with precise electronic thermometers with a long probe. Again, this allows you to accurately observe and maintain the required temperatures.
- In an ordinary saucepan, milk can easily burn. In a cheese factory, no.

Ingredients:
- Enzyme for cheese Meito - 1/10 pack
- Fresh goat milk - 10 l
The main difficulty in this recipe is finding the right goat's milk. It must be natural, unpasteurized and of good quality.
Technology:
- We prepare the equipment. To achieve sterility, we pour boiling water over the cheese factory or pan.
- If we use a cheese factory, we fill the water jacket cold water. We bring the hose to the lower fitting and fill it until water flows through the upper opening of the shirt. If we use a pan, respectively, we skip the step.
- Pour the milk into the working container and start heating up to 35-35°C. During heating, stir the milk so that the temperature is the same throughout the volume of liquid.
- We use the Meito enzyme. For 10 liters of milk, we need 1/10 of a pack. With the help of scales or by eye, we separate the necessary part of the enzyme and dilute it in a small amount of warm water.
- After the milk has warmed up to the required temperature (35-37 ° C), turn off the heat and add the enzyme. Pour the dissolved ingredient into the milk in a thin stream, close the container with a lid and leave it for 30 minutes.
- After 30 minutes, a curd should form in the milk. We take a lyre and cut the clot into uniform small pieces. If there is no lyre, we use a knife or any other tool at hand. Leave the clot for 10-15 minutes so that the whey separates from the curd.
- If the cheese grain has seized during this time, we break it and start the second heating. This time up to 45°C. Cheese grain during heating also do not forget to stir constantly.
- Upon reaching a temperature of 45 ° C, turn off the heating, separate the cheese grain from the whey. To do this, pour the mixture from the pan into a colander, the grain will remain in it, and the whey will simply drain.
- The next stage is grain ambassador. Stir the grain, gradually add salt. For complete salting, a few pinches of salt are enough.
- We take out the salted clot from the colander and send it to the cheese molds, which should then be sent under a heavy press. The pattern is simple - the heavier the press, the denser the cheese will turn out.
- The cheese remains under pressure for 3-4 hours, then we send it for a few more hours in the refrigerator.
For taste in cheese, in addition to salt, you can add various herbs and spices. Someone uses dill, parsley, paprika, garlic. At this stage, we focus solely on our own taste preferences.
Video recipe for making natural goat cheese
Outcome
At the exit, you will get 1.5-2 kg of fragrant and tasty homemade cheese.
By the way, whey drained into the sink can also be used for good. It can be used to make ricotta cheese. The recipe is very simple: pour the whey into a separate pan, heat it to 90 ° C (do not boil!), Add vinegar, citric acid or lemon juice. Then we bring the temperature to 95-96 ° C, after which we also drain the whey through a sieve. The result is a delicious curd cheese.
Modern realities are increasingly forcing us to think about what we eat. Therefore, already forgotten recipes for home products are remembered and improved. So we invite you to remember such a wonderful home-made product as goat's milk cheese - the cheese got its name because it is made not from cow's milk, but from goat's milk. Our chef reveals several recipes for its preparation.
Homemade goat cheese
Before preparing goat cheese, let's recall its benefits. Many people know that goat's milk, unlike cow's, is well absorbed and does not cause allergic reactions. AND homemade cheese from goat milk is saturated with valuable microelements (potassium, phosphorus, calcium, iron, selenium) and vitamins (B2, B3, B6, B12, D) in a form that is easily digestible for our body. It is low in cholesterol and calories, so it is a choice for cheese lovers who want to get rid of extra pounds. The antioxidants and beneficial bacteria contained in it help the body stay in shape and fight various infections and carcinogens.
This super-healthy product has a pure white color and a light spicy taste, goes well with white wines, and can also be a great beer snack.

goat milk cheese recipes
There are many recipes for how to make goat cheese. We have selected for you some of the most delicious of them.
Soft goat cheese

Required Ingredients:
- goat milk - 2 l
- salt - 2 tbsp. l. (without slide)
- eggs - 6 pcs
- sour cream - 400 g
Cooking method:

Fused

Required Ingredients:
- goat cottage cheese - 500 g
- salt - a pinch
- butter - 1-2 tbsp. l.
- soda - 12 g
Cooking method:

Until the moment of solidification, the finished product can be given a certain shade of taste with the help of your favorite seasoning or herbs.
Solid

Required Ingredients:
- goat milk - 3 l
- cottage cheese (store or homemade) - 1 kg
- eggs - 1 pc.
- soda - 12 g
- salt - a pinch
- vegetable oil - 100 ml
Cooking method:

We lay out the almost finished product in plastic bottle with cut off top. When filling the bottle, try to pack the cheese mass tightly. Put the container filled with cheese in the refrigerator until it cools completely. It is better to store the product in the same bottle in the freezer - taste qualities he will not be harmed by it.
Find impeccable, practically tested recipes for homemade goat cheese on the gastronomic resource superbly delicious ideas site. After studying the basic recipe, try to make a tender, high-calorie or spicy cheese. Add various ingredients, herbs and spices. Find your original sophistication in taste!
It is very difficult to overestimate the benefits of goat cheese, given the unique, incomparable set useful substances and microorganisms contained in it. And given its hypoallergenicity, lack of cholesterol and easy digestibility, it becomes an almost indispensable product for a large category of adults and children. For the manufacture of basic plain cheese needed minimum set ingredients: fresh goat's milk and an acidic component that will allow this milk to curdle. As an acid, you can use table or Apple vinegar, lemon juice, sour cream, cottage cheese and kefir.
The five most commonly used ingredients in recipes are:
Interesting recipe:
1. Pour goat's milk into a saucepan.
2. Add salt and heat to 87-90°.
3. In a thin stream, without ceasing to stir, pour in lemon juice (vinegar).
4. As soon as the milk separates into fractions: whey and curd mass, remove the saucepan from the stove.
5. Line a colander or sieve with several layers of gauze.
6. Pour the contents into gauze, allow to drain for 20-30 minutes.
7. Get gauze from curd mass like a bag.
8. Press lightly.
9. Place the future cheese in a colander.
10. Put a small press on it (200-300 grams).
11. Leave in a cool place until completely cool.
Five of the fastest homemade goat cheese recipes:
Helpful Hints:
. The whey left in the cheese process can be used to make pancakes.
. The taste of goat cheese can be varied by adding cumin, pieces of sweet pepper, dill, coriander and other fresh herbs. And you can sprinkle the finished cheese with your favorite spices.
Goat's milk makes wonderful semi-hard cheeses. They can be cooked like Dutch cheese (like Gouda or Edam) or like Swiss made with propionic bacteria. Goat cheese is most often coated with black wax to bring out its white flesh.
Equipment
- Form for hard cheese for 2 kg;
Ingredients
- 15 liters of goat milk;
- 1/8 tsp (0.4 g) mesophilic starter MM101 or MA11, or 1/16 tsp. (0.35 g) Uglich-6 or Uglich-7;
- 3/4 tsp (3.75 g) liquid rennet;
- 3/4 tsp (3.75 g) calcium chloride solution;
- 20% brine for salting cheese.
Yield 12% of milk volume - 2 kg of cheese
Cooking
1. Pour milk into a saucepan and heat to 29°C, stirring occasionally to prevent milk from sticking to the bottom. Remove from fire.
2. Sprinkle the mesophilic starter onto the surface of the milk, let stand for 3 minutes to allow the powders to absorb moisture. Then mix the entire volume of milk with a large slotted spoon.
3. Dissolve liquid calcium chloride in 50 ml of water. Pour the solution into the milk. Also dissolve in 50 ml of water rennet extract and pour into milk. Mix everything with smooth movements with a slotted spoon.
4. Cover and leave for 30 minutes to form a clot.
5. Check for a clean compartment, if necessary, let stand for another 10-15 minutes to form a firm clot. Cut the clot with a long knife into cubes with a side of 1.5 cm.
6. Stir slowly for 5 minutes. Leave to stand for 5 minutes. Then stir for another 10 minutes. Leave for 10 minutes for the cheese grain to settle to the bottom.
7. Remove 1.5 L of serum (10%). Instead of whey, pour the same amount (1.5 l) of hot water at a temperature of 60 ° C into the pan. Stir the mass for 10 minutes. Then leave for 10 minutes for the cheese grain to settle to the bottom.
8. Now remove a third of the serum (5 l). Pour the same amount (5 liters) of hot water at a temperature of 43 ° C into the pan to bring the temperature of the mass to 37 ° C.
9. Stir the mass for 20 minutes, the cheese grain should be the size of a pea. Leave for 10 minutes for the cheese grain to settle to the bottom.
10. Pour the whey through the cheese mold so that it warms up. Line the mold with a drainage bag or gauze, if using a micro-perforated mold, no bag is needed. Put the cheese grain in a mold and smooth, large pieces break it with your hands. Put the ends of the bag on top, try to make as few folds as possible.
11. Put the lid of the mold or circle, put the mold into the cheese press. Press with a weight of 4 kg (2 kg of weight for each kilogram of cheese) for 30 minutes. Then take the cheese out of the mold, remove the bag, turn the cheese over again, avoiding wrinkles. Now press with a weight of 8 kg (4 kg of weight for each kg of cheese) for 8 hours.
12. Take the cheese out of the mold and put it in 20% brine for 12 hours (6 hours for each kilogram of cheese).
13. Remove the cheese from the brine and place on a wire rack to dry for 2-3 days at room temperature until the crust is completely dry. Turn the cheese twice a day so that it dries and ripens evenly.
14. Put the cheese in a room with a temperature of 10 ° C for one week. After that, cover the cheese with wax.
15. Return the cheese to the 10°C holding room and allow to mature for a minimum of 6 weeks and up to several months. Turn cheese once a week.
If you wish, after two months of aging, you can remove the wax and lightly smoke the cheese.
How to prepare 20% brine
Dissolve 4 liters of water, bring to a boil, dissolve 1 kg of rock salt. Cool to room temperature and strain or carefully drain so that all the dirt from the salt (if any) remains at the bottom. Add 5 ml of 6% vinegar, 5 g of dry calcium chloride or 40 ml of 10% calcium chloride solution. The brine can be used several times.