Star News


How to store greens in the refrigerator and dried correctly? Dried parsley
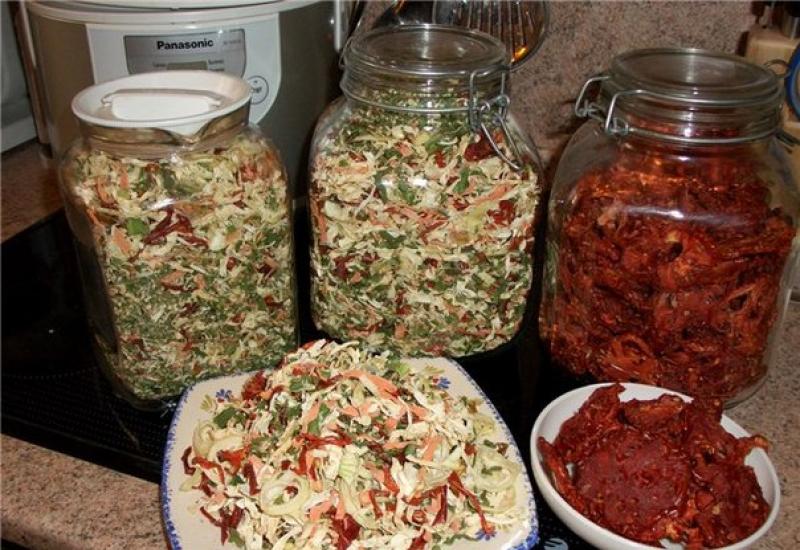
To enjoy the excellent taste of greens in your dishes in the cold season, prepare it in advance by combining not only dill and parsley, but also green onions into one dried bouquet. Yes, green onions! It not only dries perfectly in the oven or in an electric dryer, but also has the brightest aroma among all other greens!
Don't believe me ?! Try to dry it yourself at home and your house will be filled with the aromas of the outgoing summer. By the way, in order to have at hand a different caliber of dried herbs, you can grind only half of it, leaving large dried slices for pickles or for decorating dishes.
Ingredients

- 1 bunch of green onions
- 1 bunch of parsley
- 1 bunch of dill
- salt optional
Preparation
 1. Rinse each bunch of greens thoroughly, and disassemble the onion into stalks. Chop the parsley into coarse chops.
 2. Do the same with the rest of the greens.
 3. Line a baking sheet with parchment paper and place the chopped greens on top. Dry in the oven for about 30-40 minutes at 90-100C. At the same time, the oven door should be slightly open so that the air can freely condition.
 4. The mass of dried greens will be halved and the branches themselves will break when pressed with a finger.
 5. Pour half of the dried mass into a container of a blender or food processor and chop.
 6. Do not forget to add salt to it for weight, as dried herbs themselves are very light and not dense.
Fresh herbs can enhance and change the taste of familiar dishes for the better, give them unusual notes. True, the product is perishable, so you need to know how to store greens in the refrigerator and freezer, how to dry them for the winter. Using simple techniques and affordable approaches, you can keep products appetizing and attractive for several weeks or even months. At the same time, neither the gastronomic characteristics of the blanks, nor the nutrients in their composition will suffer. The main thing is to protect products from the effects of heat and ultraviolet radiation, as well as a number of other negative factors.

How can you store fresh herbs?
- We put the products in a small bowl, fill with cool water and rinse thoroughly. After that, we rinse the workpieces under running water, shake them off and lay them out on a towel. We dry the components for at least a quarter of an hour, shaking them regularly. After that, we fill dried plastic containers or glass jars with fresh herbs and close them with sealed lids. If everything was done correctly, the blanks will remain in their original form for a month.

- Plastic bags can also be used to store very fresh food for one week. In this case, the products also need to be thoroughly washed and dried, packaged in packages without filling them too much. After that, we try to fill the container with more air and pack it. The best place for stocking is the refrigerator shelf located next to the freezer.

Tip: If there is a lot of greenery, you do not need to wash it. It is enough to sort out the products, remove faded or darkened branches and put them in a bulk bag. Add a few small peeled onions there, which we change every 5 days. At the same time, we change the bag to dry.
- Within 2-3 weeks, the products will remain fresh if wrapped in the most ordinary paper without inscriptions. To do this, rinse and dry the greens, wrap them securely in a sheet of paper without leaving gaps. Before putting the workpiece in the refrigerator, it must be sprayed with water from a spray bottle.

Greens, with the exception of lettuce, can be kept in the refrigerator without pretreatment. But in this case, it should be well dried in the fresh air until the signs of moisture completely disappear. This product is packed in a perforated plastic bag and placed in the vegetable compartment.
Freezing herbs at home
Any member of the impressive group of green plants will retain their freshness and benefits when properly frozen. You just need to consider a few important points:

- Components must be cleaned, washed, dried. The leaves should be removed from the stems. For storage of workpieces, plastic containers with sealed lids are ideal.
- Parsley, sage, dill and thyme should be chopped beforehand, so they are better stored.
- Dill and mint can be packaged not only in plastic, but also in food foil.
- After packaging, rosemary and basil should be sprinkled with fine salt. For other types of greens, this can be disastrous.

It is allowed to keep only one type of product in one package. Combining several varieties of greens is possible only if the cut mass is frozen in portions in water, butter or vegetable oil.
Features of storing different types of greens
In addition to the universal rules for keeping greens fresh, you should familiarize yourself with a number of specific points. Compliance with them will help to achieve the maximum shelf life of products:
- Dill and parsley can also be stored at room temperature. But for this, the bunch must be placed with stems in a container with water, and the leaf part must be covered with a bag. The liquid is changed every 2-3 days.
- It is recommended to keep mint and dill not in a large bunch, but to divide it into small parts. This will maximize the preservation of their flavor.
- Do not cut off the white parts from green onions. It is better to remove the transparent film from them, moisten them in cold water and wrap them in a damp cloth. First, we pack the blank in plain paper, then in a plastic bag and put it in the refrigerator.
- Lettuce softens quickly and loses its crisp texture. To prevent this from happening, you need to take a bowl, line it with a paper towel, lay out the salad, put another towel on top. We wrap the structure with cling film and put it in the refrigerator. Freshness is guaranteed during the week.

If it seems that the workpiece has lost its aroma after long-term storage, put it in cold water for a few minutes. The scent will return and be as intense as at the beginning.
How to dry greens according to all the rules?
At home, you can use two methods for preparing blanks. Before drying the greens, the products will need to be washed and dried. Next, we act according to one of the schemes:
- In the oven. Separate the leaves from the stems and chop finely. Distribute the mass in a thin layer over a dry and clean baking sheet, cover with a sheet of waxed paper. We put the structure in the oven, preheated to 40 ° C, and keep it at the same temperature for three hours. After that, the composition is laid out in sterile glass jars and closed with lids.
- On air. We collect the stems of plants in small bunches, which we tie with a thread. We hang them in a warm, dry room, leave them for several days. We lay out the finished product in glass jars.

Stocks need to be inspected regularly. If traces of moisture appear on the walls of the container, the containers need to be changed, and the blanks must be dried again, but this time no longer than half an hour.
Harvesting green onions for the winter
- We wash my product, dry it, clean it from surface films and cut it into small rings. Dry the mass again by spreading it out on a paper towel. By the time of packing, the onion must be completely dry, otherwise its taste characteristics will suffer. We lay out the workpiece in plastic containers or small bottles and put it in the freezer.

- Wash onions, peel, chop and dry slightly. Place in ice cube trays and fill with water, vegetable or melted butter. We put it in the freezer for storage.
Green onions, harvested in one of the above ways, do not need to be thawed before use. It, like dried ingredients, is simply added to dishes at any stage of their preparation.
When the season of fresh vegetables and fruits begins, your favorite, tasty and aromatic greens appear, and you need to save them so that you can taste dishes seasoned with finely chopped dill, parsley, basil, celery, cilantro and other healthy herbs even in winter. Therefore, in the season when greens are not expensive and there are a lot of them in stock, you need to stock up on these gifts of nature and prepare for winter. Now let's figure out how to dry dill and other herbs, and in what ways it is better and easier to do it.
All the rules for drying dill can be applied to other greens: parsley, basil, cilantro, celery, marjoram, oregano (oregano), mint, green onions (batun) and even rucolla.
Preparing dill and herbs for drying
First of all, prepare the greens, you need to sort it out and rinse it, throw away the yellow and sluggish leaves. Be sure to rinse the dill with cold water. The fact is that warm water can ruin a beautiful color, and the plant will immediately become lethargic. We do not need this, if we are wondering how to dry dill for the winter at home, we must study it and do everything right.
After you have washed the dill and herbs, you need to spread it out on a dry cotton towel, in a draft, for example, near an open window. So that the greens dry well. Of course, it is better not to rinse dill and other herbs at all before drying. Therefore, if you collect greens in your garden and pick off the top, clean leaves and twigs, you do not need to wash them.
How to dry dill at home
![]() Now let's go directly to the question, how to dry dill at home... Prepare kitchen paper towels to dry the herbs. Do not use magazines or newspapers, because printing ink is toxic, and wet dill will absorb all these harmful substances, which is definitely not suitable for us. Dry (not wet) greens can be laid out simply on the table surface, without any kind of bedding.
Now let's go directly to the question, how to dry dill at home... Prepare kitchen paper towels to dry the herbs. Do not use magazines or newspapers, because printing ink is toxic, and wet dill will absorb all these harmful substances, which is definitely not suitable for us. Dry (not wet) greens can be laid out simply on the table surface, without any kind of bedding.
We lay out chopped dill, or whole branches on paper towels, not very tightly. It is better to take more paper so that the greenery is spacious, and it dries well, does not stick together. Another important point, before drying greens, find the most ventilated place in the house, where there is no sun. Mistakenly, many people dry dill on the windowsill, it withers from the sun, loses its color and taste. Of course, dill will dry out much faster in the sun, but, as mentioned earlier, it will lose color and taste. Therefore, it is better to spread the greens in the dark (or shade) and wait a few days.
 The readiness of dried herbs is very easy to check. You need to crumple a leaf (twig) in your hands, it should crumble, making a crunchy sound.
Another way to dry your dill if you want to keep the greens intact. It is necessary to tie the dill in bunches, and hang it on a thread in a ventilated dark place until tender. So the twigs (stems) will remain intact. Remember that we do not dry the bundles in the sun, we hide them where it is dark, and there is ventilation!
Then the greens dried on the stalks must be chopped. If you want a store-like seasoning, chop the herbs by rubbing them through an iron sieve (see photo). It's very simple, but the result is wonderful!
Now we know how to dry dill in twigs and chopped.
How to dry greens for the winter at home
As for the rest of the greens - everything is simple, everything is the same as with dill. Thus, you can dry at home for the winter: parsley, basil, cilantro, celery, marjoram, oregano (oregano), mint, green onions (batun) and even rucola.
Rinse well, sort out, discard the sluggish and yellow leaves, and finely chop, well, or leave whole branches, hang and dry in bunches. Place on paper towels and dry in the dark until tender. But if you dry a variety of greens, you can make joint seasonings from it, the main thing is to know which greens are suitable for which. Just before you dry the dill for the winter, parsley, basil and all other plants together. Lay them out separately to keep the flavors from mixing, and then, when ready, blend together for an incredible flavorful seasoning.
How to properly store dried herbs for the winter
 So, now we know well how to dry dill at home, and we will figure out how to preserve it so that the delicious smell that spices up any dish remains for a long time. Purchase a set of small glass jars, small and medium (100 ml - 500 ml), and so that the lid closes tight and well. If you have children, there will be no problems with the jars, you can take them from the purchased mashed potatoes, since usually such jars are "still useful", they, like many others, are not thrown away and are stored on demand. Here they fit perfectly. Good cans with vacuum lids (rubber band lids) are now available at many major hardware stores. Dried greens are stored in glass for the longest time, since moisture cannot get there.
If you are not storing jars of dried herbs in a closet, not in a dark space, it is better to use non-transparent jars. Also acceptable containers, these are cans, for example from under coffee, if you can close the lid well and tightly in them.
Now we figured it out how to dry greens and dill how to store. Remember that overdrying dill means ridding it of all vitamins and all its rich promises. Therefore, we do not allocate more for this. three days. If you dried the dill correctly, the place was well ventilated, and it was dark and dry, the greens after this time will be ground into a fine powder in your hands.
Dill greens are one of the first herbs used in cooking. Dill is flavored with salads, first and second courses of meat, poultry and fish. How to preserve these spicy greens for the winter is the main topic of our conversation today. The best way to store dill is to freeze and dry it. At the same time, dried herbs have the brightest aroma. We will talk about how to properly dry dill at home so that it does not lose its taste and useful properties, we will talk in this article.
If you plan to process greens from your own garden, then you need to carefully approach the issue of its collection.
It is best to use very young plants for drying, which have not yet started up a dense tube with a seed umbrella. Collection time falls at the beginning of summer.

Cut the dill off the garden bed, preferably in the morning, immediately after the dew has melted. If it rained at night, even a little, then it is better to postpone this procedure for another time, since the greens will be excessively wet, and this can lead to its premature deterioration. For the same reason, dill collected from your own garden should not be washed.
If you buy greens on the market, and the purity of the product is in doubt, then the bunches of dill are rinsed under running cool water and dried thoroughly. A waffle or paper towel is suitable for this. Also, a bunch of grass can be placed in a glass in a draft so that the water droplets from the plant evaporate.
In what form to dry dill
The best way is to dry the whole branches, and then, already dry, grind the thin leaves from the coarse stem. The advantage of this method is that the essential oils in the plant will evaporate less and the seasoning will remain fragrant for a long time.
If, nevertheless, a decision is made to dry the plant without stems, in a chopped form, then you do not need to strive to chop the dill too finely. It is best to do this just before the cooking process, rubbing a whisper of greens between your fingers.
The main ways to dry dill at home
Drying in the open air
Prepared greens can be dried in bunches or shredded.
Small bunches, 5-6 branches each, are fixed with a thread to any canopy, placing them down with foliage. At the same time, direct sunlight should not fall on the place for drying greens, and it itself should be well ventilated.

Chopped dill is also shaded dry in a small layer on trays or flat plates. The grass can be covered with gauze on top to avoid dust settling on the workpiece.
Watch the video recipe from the Cooking channel. Video recipes "- How to dry greens for the winter
How to dry dill in the oven
Since there are a lot of aromatic oils in dill, this herb should be dried at the lowest possible oven temperature, preferably up to 40 degrees. Too high an oven temperature can also lead to discoloration of the workpiece and loss of its useful qualities.
Dill slices and twigs are placed entirely on baking sheets lined with wax paper. The oven door is kept slightly ajar. This will allow the air to circulate well. The baking sheets should be removed every 30 - 60 minutes, the greens should be mixed and inspected for readiness.
The total drying time can take 2 to 4 hours.
![]()
Drying greens in an electric dryer
Prepared foliage or twigs are laid out in a loose layer on pallets and the unit is switched on to the "Herbs" mode. If your electric dryer does not have one, then the temperature should be set yourself within 40 degrees. The product will be fully cooked in 3 to 4 hours.
Watch the video from the channel "Ezidri Master" - How to dry dill with high quality? Dried greens. Herbs
Drying dill in the refrigerator
On a flat plate, spread a thin layer of chopped greens or small twigs. From above, the structure is covered with a napkin. The container is placed in the plus compartment of the refrigerator on the lower shelf, and forgot about it for about 2 to 3 weeks. During this time, all the moisture from the grass will evaporate and the workpiece can be transferred to jars for storage.
How to dry greens in the microwave
Slices or twigs are placed on a paper plate or on a flat container lined with a paper napkin. Cover the dill on top with another layer of thin paper. In this form, the greens are sent to the microwave oven for 3 minutes of operation at maximum power. After a specified time, the top napkin is removed, and the greens are examined and mixed. If necessary, drying continues in the same mode for another 2 - 3 minutes.

How to check the doneness of dried herbs
Qualitatively dried dill easily turns into a fine powder if you try to grind the twigs between your fingers. If the greens wrinkle, but do not break, continue drying.
Store the dried product in dark glass jars with a tight-fitting lid in a dark, dry room. Coffee bags with a zipper are also great for storing spicy herbs.

Dried spicy parsley has a delicate spicy and aromatic taste. It is prepared from a leafy vegetable variety. In contrast, the root type of parsley is a weakly branched thickened root.
The seasoning is used all year round to improve the taste of meat garnishes, vegetable and fish dishes. In addition to aromatization, the use of dried herbs normalizes the water-salt balance and the functioning of the gastrointestinal tract in the body, promotes good absorption of food.
Dried parsley contains healthy vitamins, minerals and antioxidants just like fresh parsley, albeit in smaller quantities.
It should be noted that in the composition of most spices, spicy parsley is present in the form of fine chopped dried herbs or ground seeds.
Dried parsley recipe
Before drying, rinse the greens with water, shake them off and lay the leaves to dry separately from the stems on a wire rack or paper towel.
Put the grass to dry in the oven for several hours at about 50 degrees.
- Parsley is not chopped, but cut to preserve the juice, which contains flavoring and aromatic substances.
- If you put the roots of the grass in a wooden box, sprinkle with dry sand and put in a cool dark place, then the roots of parsley will be stored for 3-4 months.
- Even in the most sultry heat, it will retain its fresh appearance if it is placed in a dry, tightly closed container, and the parsley must also be dry.
- For salad, the young roots of the herb are best chopped on a grater.
- Sprinkle parsley with warm water instead of cold water.
Having cut and sprinkled with salt, fresh parsley in a home freezer is kept in an airtight container for several months. Dried greens packaged in paper bags and stored in a dry place.