Star News


Easter crafts from different materials. Crafts for Easter from salted dough with your own hands Crafts on the theme of Easter from salted dough
Made of various materials.
You can use napkins, cotton pads, and even dough.
You can safely involve children in such creative work, for whom it will be not only interesting, but also useful.
Here are some very interesting Easter crafts that can be made from different materials:
Easter dough craft: Easter medallion eggs
You will need:
Salty dough
Ruler
Dough cutting mold
Scapula
Tubing (for small holes)
Aluminium foil
Paints (acrylic or aerosol)
Twine or tape.
1. Prepare the salted dough. There are many ways to do this.
* If you don't want to make the dough, you can replace it with polymer clay.
Here's one way to make salty dough:
2 cups of flour
1 tbsp. a spoonful of fine salt
1 tbsp. spoon of wallpaper glue
* Mix flour and salt. Add a little water (a few spoons) to the glue and wait until it swells.
* Stir flour, salt and glue - knead the dough. You can add some water if you like. You should get a dough that sticks to your hands.

2. Use a rolling pin to roll out the dough to the desired thickness. In this example, the thickness of the dough is 6 mm.
3. Cut chicken eggs out of the dough.

4. Place these tins on a baking sheet covered with aluminum foil or baking paper. Make small holes with a straw so that the crafts can be hung later.

5. First bake at a low temperature - about 100 C. Then remove the aluminum foil and put the baking sheet back in the oven at 125 C. Be careful not to burn yourself. You can use parchment paper instead of foil and bake at 120 degrees for 2 hours.

Then place the salted dough pieces on the wire shelf.
You can turn off the oven and wait for the dough to dry.
6. Start painting your blanks, and after the paint dries, tie a ribbon and hang.

Easter pasta crafts: large Easter egg

You will need:
Pasta of different shapes
Markers (markers)
PVA glue
Paint (aerosol)
Big balloon
Hot glue.
1. Inflate the balloon.
2. Mark the place for cutting on the ball with a marker.
3. Apply PVA glue to the entire ball, except for the designated area.


4. Begin gluing the pasta to the ball so that you have a pattern.
5. When everything is dry, you need to remove the ball - pierce it with a needle.

6. It's time to decorate the craft. It all depends on your imagination.
7. You can put the craft on a stand and paint with spray paint - in this example, gold.


DIY pasta crafts for Easter


You will need:
Chicken eggs
Small pasta
PVA glue
Aerosol paints (if desired).
1. Get rid of the contents of the egg.

2. Apply PVA glue to the shell.
3. Glue small pasta to the shell (you can glue each pasta, sprinkle or dip in a bowl).
4. You can use lentils or peas in addition to pasta.
5. When the glue is dry, paint the egg. Paint one side first, then paint the other half.


Easter paper crafts
Easter chicken. Option 1.
To make such a craft, you first need to draw a template.


Easter chicken. Option 2.
A paper chicken can be made from paper plates or cardboard from which you want to cut a circle. Just fold the paper plate in half, cut out the wings, eyes, beak and scallop from colored paper and glue them to the plate.


3-D Chicken


Easter napkin crafts: stand

1. Prepare a paper towel and fold it in half diagonally.


2. Fold the corners of the resulting triangle up so that they connect to the top corner. You should have a square.

3. Roll the bottom edge of the square to the middle with a roller.

4. Now flip your design and connect the bottom corners that are under the roller. These corners should be secured with a paper clip.

5. Flip the blank back so that the paper clip is at the back. Spread the ends of the blank in different directions, and you will get a beautiful stand for an Easter egg.
We paint eggs with do-it-yourself napkins

1. Dip a paper towel in the vinegar, squeeze out any excess, and wrap it around the egg.

2. Place the egg on a plate or baking sheet and gently begin adding drops of colored food coloring.

3. When the whole egg is colored, remove the paper towel and place the colored egg in the carton.

Easter egg crafts: decoupage

You will need:
White eggs
Napkins with beautiful designs and patterns
Scissors
PVA glue.

1. Separate the topmost layer from the paper napkin, you will not need the rest.
2. Cut out beautiful designs and patterns. You can cut with white edges and not necessarily neatly.
3. Prepare an egg and brush it with glue or egg white.
4. Glue the cutout pattern to the egg and apply a layer of glue on top with a brush.
When everything is dry, you will have a beautiful Easter egg.
Crafts from cotton pads for Easter: chicken


You will need:
Cotton pads
Yellow paint for eggs
Colored paper
Scissors
Chenille wire
1. Dilute the yellow paint with water. Dip 2 cotton pads in the solution and stain. Then leave the discs to dry.
2. Use chenille wire to make chicken legs.
3. Cut the scallop, wings and beak out of colored paper.
4. Glue all parts between two cotton pads.
5. Glue the toy eyes and the chicken is ready.
DIY Easter wreath

You will need:
Willow wreath (you can make a wreath with your own hands)
Plain paper napkins
Corrugated paper
Colored and regular cardboard
Scissors
Simple pencil
Hot glue
1. Making decorations for the wreath. Cut out several circles of different diameters from paper: the circle for the body has a diameter of 5 cm, for the head 4.5 cm. The more circles, the more voluminous the detail.

2. Cut 2 more circles out of cardboard, each with a diameter of 2-3 cm. This will be the base of the chicken.
3. Now glue all the pieces together. Start by applying a little glue to the center of the first circle and glue the next one. Thus, glue all the circles together.

4. Glue a piece of cardboard to one of the circles.
5. In a similar way, you need to glue another stack of circles.
6. Make small cuts on the circles, and then fluff the circles.

7. Cut out the chicken's beak, legs and wing from colored cardboard. In order to fasten the body of the chicken, cut a strip from the cardboard and glue all the details to it - the wing on one side, and everything else on the other.
8. Make the eyes. You can use plasticine, buttons or other parts that are suitable in size and shape.
* If you wish, you can make another chicken in a different color.

9. Making decorative flowers and eggs. Take dust wipes. Felt can be used, but it is more expensive. Cut out ovals that will act as Easter eggs and various patterns for them.

This type of folk art has become popular not so long ago, although its origins lie in the most ancient layers of Slavic culture. If you are in doubt, then remember the same Kolobok: why not an artistic product made of dough? Working with such a test is not only easy, but also accessible to everyone. Firstly, in which house there is not a handful of flour, and secondly, this material is much more malleable than the same gypsum, and much more durable than the usual plasticine. That's why salt dough crafts so we all fell in love.
Such wonderful lambs can decorate a Christmas tree.
If you add paint to the dough, you get multi-colored products. It is best to use food-grade dyes, for example, for dyeing eggs.
With the help of stamps and paint, you can make drawings on salt dough cookies.
According to some rumors, the dough sculpting was invented by chefs who were bored just to cook. So they had fun decorating their pastries along the way. But not only they appreciated the convenience of this material, its pleasantness to the touch and flexibility to give it different forms. Like most craft supplies, dough is not very expensive. As from the same plasticine, whatever your heart desires is molded from the dough. Both paintings and figurines made from salt dough can be placed on walls and shelves, or used as toys. A picture with flowers from such a test will be a great gift for friends. Today, like crafts from a plastic bottle, salted dough products are becoming more and more popular, and therefore this direction of creativity needs a detailed study and a theoretical basis for it.
Not only beads are suitable for decoration, but also natural materials: cereals and seeds.
Salted dough crafts are durable, which means they can decorate the interior for more than one month.
Recently, this art (and dough modeling is, without a doubt, an art) has even been given a separate name - dough plastic. But, despite the novelty of the name, no one doubts that people began to sculpt figures from dough since those ancient times, when they only learned how to make flour. The history of every civilization mentions dough modeling as an important part of religious rituals, folk art, and sacrifices. After all, both flour and water, and the bread obtained from them, are an important part of the culture of mankind as a whole. Working with the dough, many people manage to come up with their own names for this technique: flour, bioceramics and, of course, dough plastic. But no matter how you call it, the result often exceeds all possible expectations! When a masterpiece is born from salted dough, it becomes a real event, because the soul invested in the craft returns a hundredfold greater return in the form of a living toy - salt dough figurines... Perhaps that is why salted dough has become such a popular material for the creativity of children of all ages. Like plasticine, salted dough products can be molded of any complexity.
With the proper skill, you can make such an owl.
You can use gouache to paint the owlet, and you can fix it with a manicure glitter.
Nobody can say exactly how many centuries dough plastic has existed. But during this time, the procedure for working with salted dough has not changed at all. All the same water and flour. And to preserve the crafts from various pests, salt is added.
You can learn about the features of working with salt dough from many sites. But if you yourself have been modeling salt dough for a long time, then you also have accumulated experience with this material, there are examples of work, photographs of products that can be posted on such Internet pages. You can also create your own blogs and even websites dedicated to this art. Believe me, with the current popularity of testoplasty, your developments will interest many like-minded people. At least on thematic sites, a personal author's gallery will be created for you. And even if your photographs are not an example of perfection, professionals will bring them to mind and present them in the best possible light.
For Christmas decor, you can make toys from salt dough.
Fortunately, the times have long passed when dough figurines were used only as sacred objects. The epochs of famine and wars have also passed. The folk “mukosol” gradually turned into a newfangled “bioceramics”. The oldest decorative craft began to revive as an independent applied art. Today, dough plastic is gaining more and more popularity in craft schools and circles. Everyone who has joined this art appreciated the salty dough as a plastic and warm material, as well as a source of great pleasure from working with it. A big plus in its favor is the availability of the material for home use.
Salted dough is a very plastic material. You can dazzle both flowers and little people from it.
These are the beautiful hearts you can make for Valentine's Day.
Angels and hearts will come in handy for Easter.
To be on your own make crafts from salt dough, you can preview several master classes on the Internet. You can read step-by-step instructions, as well as get acquainted with the photo collections of works made from salt dough offered on various sites. This will help provide additional inspiration for your next steps.
It is best to make crafts from salt dough with children.
For salt dough, you will need water, flour and, in fact, salt.
As for the recipe for the dough itself, it is standard for ordinary volumetric figures:
- Flour - 200 grams or 1 glass,
- Salt - 200 grams or half a glass,
- Water - 125 milligrams.
It should be noted that salt is much heavier than the same volume of flour. And therefore, with the same weight, they differ in volume: salt is taken about half as much by weight as flour.
* And for embossed thin figures, you can optionally add 15 grams of PVA glue (one tablespoon), one tablespoon of starch or wallpaper glue, which must be previously mixed with water.
* There are separate recipes and strong dough for large products: one glass of flour and salt (200 and 400 grams, respectively) and 125 milliliters of water.
* Experts also offer a dough recipe for delicate work: flour - 300 grams, salt - 200 grams, glycerin - 4 tablespoons (you can buy it at a pharmacy), glue for light wallpaper - 2 tablespoons and water - 125 milliliters (you need it first stir with glue).
To facilitate the process of kneading the dough, it is better to use a mixer, which will not only greatly simplify the task, but also make the dough much better.
For the manufacture of colored dough, you can use both food dyes and aniline, but the simplest and most affordable are watercolor and gouache. An excellent color of chocolate will be obtained by adding cocoa to the dough. When choosing a shade, it should be borne in mind that during the drying process, the tone will become less saturated, but when the craft is varnished, the color will return to its former brightness.
Salted dough for crafts is made in the same way as for dumplings, with the difference that the components differ in content.
The dough should be tight and elastic.
Advice: Let the dough "sit" for a few minutes.
Shape cookies using stencils.
Stock up on stamps for cookie décor.
Lightly wet the stamp and scoop up the glitter.
Now transfer the decor to the cookie.
Don't forget to use beads, rhinestones and rhinestones for decoration.
Now is the time to put the cookies in the oven.
But here's another important detail: punch a hole in the cookie to insert the tape and attach it to the tree.
And now - in the oven.
You can decorate the cookies with colored powder and shiny varnish.
By the way, many masters recommend adding a little vegetable oil or hand cream (about 1 tablespoon) to the dough, which can add additional plasticity to the dough. And it is also recommended to replace water with jelly, cooked from starch - potato or corn (dissolve one tablespoon of starch in half a glass of cool water; then a glass of boiling water is poured into the starch with constant stirring; after the jelly has thickened and became transparent, the resulting paste needs remove from the stove.) The dough will benefit from the paste, because it will become even more plastic. But you should not overdo it, and if the dough is too soft, you will have to mix it again with a slight additional amount of salt and flour. Make the salted dough thicker. There are also tips to place the salted dough in a plastic bag for 2 hours in the refrigerator. There it can be stored for later use.
Salted dough can be an excellent decoration for the kitchen.
For crafts, stock up on gouache or colored varnish.
Salted dough makes wonderful souvenirs.
Making crafts from salt dough
You can start working with this material by performing autumn crafts from salt dough... After all, it is autumn that is extremely rich not only in forms for imitation in the form of ripe fruits, but also in various natural materials that can be included in the product as a full-fledged element, as well as as a reinterpreted symbolic image of some part of nature or a certain image. You can make a kind of still life in the form of a picture or a bas-relief with the same apples, pears, pumpkins and other fruits and vegetables. Or you can make voluminous crafts and place them on a plate or a special stand. You can make a whole installation "Autumn Garden and Vegetable Garden" with the same fruits, or you can play with the theme of the autumn forest. In this case, along with salty dough, natural elements can also be used - cones, acorns, spruce and pine needles. The same technique can be used to stage a fairytale or fantastic plot. Any autumn theme - a rowan branch, a carpet of fallen leaves, birds flying south - can be embodied with the help of salt dough.
Be sure to involve children in sculpting.
From the workshop, you will see how to make a Christmas garland and beautiful Santa Clauses.
After the cookies are ready, start painting them. Don't forget to punch holes.
How to do it correctly crafts from salt dough, in stages presented in step-by-step instructions, of which there are a huge number on the Internet. What is needed for such creativity? Literally everything that unnecessarily gathers dust around the house can be useful.
- For a start - the most important items: a stack or a knife, a rolling pin and a comb, which can be useful, for example, for making a basket. You will also need an ordinary pen, especially its shaft, which is convenient for making various holes and dots in patterns, cheese holes, eyes and much more.
- When decorating crafts, as well as for exciting games with children, curly knives for cutting cookies or ready-made sets of curly grooves for plasticine can be useful.
- Next, you should pick up everything in the house that is possible to make prints, for example:
voluminous buttons, hair clips, pieces of burlap, embossed lace, beads, rings, small children's toys, candle holders for a cake, forks and spoons, the handles of which are decorated with embossed patterns, the sole of children's shoes (also give interesting patterns), mixer details and a lot other inconspicuous little things.
- To prepare salty dough, flour and salt are mixed, water is added to them, the dough is kneaded. The degree of its readiness is determined only by the feel of the hands. If it crumbles, add water. If, on the contrary, it stretches too softly and sticks to your hands, then there is a lot of water in it, and, accordingly, you need to add a little flour. For the test, a ball is rolled, several small depressions are made in it with a finger. The dough that does not spread and will keep its shape can be considered ready. When mixing, it is recommended to add oil, for example vegetable oil. Thanks to this, the dough will not only not stick to your hands, dry out too quickly, but also will not be covered with a crust during work. True, you need to remember that too good is also not good: if you add a lot of oil, then the dough will start to get dirty, and its final drying will take too long. And paints will be taken with difficulty.
- Well, the dough is ready, now you can proceed directly to the molding process from salted dough. It is best to make it on a board or pan: this will immediately be a good place for the dough to dry.
- In order to make the salted dough colored, it can be dyed at the stage of kneading itself, using food paint or gouache, which will be safe when working with young children. You can also paint the finished dried product. And in order to prepare the correct color, you can use the scheme:
blue color is obtained by mixing blue and white,
pink color is obtained by mixing white and red,
we get purple color by mixing blue and pink,
green color comes from mixing blue and yellow,
orange color will come out when mixing yellow and red,
brown color is obtained by mixing green and red,
emerald color is obtained by mixing green and blue,
for flesh color, mix light pink with a drop of yellow,
and gold and silver color will turn out if you add gouache or acrylic of the appropriate color to it, you can also make a dough with sequins by adding glitter gel for gouache to it.
- Drying is carried out either in the open air in natural conditions, which is too long, or in the oven, subject to certain rules:
- the temperature in the oven should be minimal;
- the oven lid should be ajar;
- the product must not be placed immediately in a hot oven; it must be heated gradually. It is also impossible to remove the craft from the oven abruptly, it is better to wait until it gradually cools down along with the temperature of the oven itself;
- It will be ideal to carry out drying in several main stages: after an hour of drying on one side, the craft must be turned over and allowed to dry from the inside out. You can also take breaks during the drying process: an hour is dried in the oven, and then a day in the air, and again an hour in the oven, but on the back side, and then a day in the air;
- the drying time of the product largely depends on the size of the craft itself.
- require final finishing. After drying, the craft can be lightly browned in the oven, which will give it a natural shade. For decoration, the product is painted with paints and varnished. When working with the dough, any paints are used: acrylic, watercolors, gouache - that is, those with which you like to work most of all. The varnish is used acrylic or artistic. You can also use an ordinary building one, but with a water base, which can be used on breathable surfaces - parquet or wood. For more expressiveness of some small details in the craft, they can even be painted with nail polish, which usually gives a bright glossy color.
Ending children's crafts from salt dough, parents are often faced with receiving defective substandard results. This can happen due to the admission of typical mistakes, which should be avoided even at the preparation stage. For example:
- pancake flour or with some additives cannot be used to make crafts from salted dough, since the figures from it, during drying, will begin to rise like yeast dough on pies and the craft will crack;
- iodized salt also cannot be used, since its large inclusions will not dissolve, and subsequently the texture of the dough will be heterogeneous, as if into a grain;
- water should be used very cold and added in portions, fifty milliliters for each addition, after which thorough kneading should be carried out, which is associated with the likelihood of using different types of flour, which require different volumes of water;
- salt must first be mixed with flour and only then water is poured into the ready-made mass;
- salted dough can be stored in a plastic bag or in a tightly closed container. It is best to get this dough out of the bag in small slices, because they can very quickly become crusty, and when rolling or sculpting, these crusts can ruin the whole look of the product;
- if there is a crackling or swelling of a salted dough product, then this can be explained by improperly selected flour: the simpler it is and without additives, the better for the dough and future crafts;
- can be added to dough and rye flour: although the color will turn out to be grayer and warmer, crackling should not be obtained. A simple recipe is a glass of ordinary flour and a glass of rye flour, 50 grams of starch, which will also give the dough elasticity and prevent it from cracking. You can also add a spoonful of ordinary PVA glue to the dough, which gives plasticity and prevents the dough from rising;
- Crafts made from salt dough can crack even with improper drying. As mentioned earlier, the product dries better in the air, on its own, although for a long time, but you want to get the result faster. Therefore, most often drying is carried out in three stages: first in the oven at the lowest temperature and an open lid for about an hour, then a break is made for two hours, or it is possible for the night when the craft dries up by itself, then the oven turns on again at the minimum temperature when open lid;
- when a crackle appears after painting, it means that the craft is not completely dry. At the same time, the product continued to dry, and the air had no place to go, and therefore the surface of the varnish or paint cracked. There is no need to rush to paint or varnish the craft, otherwise then you will have to regret or even redo it;
- if the figure turns out to be thick, more than 7 millimeters, then at the first stage it is necessary to remove the excess dough on the back side;
- during drying, the craft must rotate at all stages: it dries for an hour on the front side, rests, then the craft must be turned over and dried on the back side;
- the parts that have fallen off can be remarkably and imperceptibly attached with the help of PVA glue.
To make the dough elastic, add PVA glue to it.
Just like real starfish.
Very beautiful spring birds.
These Christmas decorations are no worse than plastic ones.
This kind of decorative art makes it possible to very realistically perform volumetric crafts. Salted dough flowers- favorite products, especially for women, and for school girls too. It is very simple to make, for example, the same daisies, having rolled out the dough ahead of time and made the same petals in notches. You can make them by rolling out the same "sausages" and from them, slightly flattening them, form many petals for a flower. The middle is made from a flattened ball of dough. Twigs and leaves can be replaced with natural thuja twigs, similar to real chamomile leaves. And you can place flowers in a basket woven from "sausages" from the same salted dough. You need to paint flowers and a basket using the simple technology given above.
Such a cat is a vivid embodiment of Halloween.
You can make funny animal figurines from salt dough. For example, such a cute tiger.
Fish and seals.
For cat lovers, favorites crafts - cats made of salt dough... In general, this is a fertile topic in any kind of creativity - in the visual arts, and in literature, and even in music. After all, this graceful wayward pet cannot but delight and inspire, especially creative people. To make a beloved Ryzhik out of dough, you can follow the path of decorative primitivism, or you can try to make a more believable cat. True, its dimensions will be small, because the possibilities of making products from salted dough are limited by the need to adhere to the proper thickness, permissible for uniform drying of the craft. Well, everything else is a matter of technology!
It is interesting to sculpt owls, hares and baskets from the dough.
Most light crafts made from salt dough can be done by rolling the sheet and cutting out of it using grooves of various flat shapes. The advantage of this method is the speed of manufacturing a large number of different items, as well as its minimum thickness, which will speed up the drying process and protect against subsequent deformations. This technique most of all allows the use of different presses and impressions. A similar principle can be used to make a children's mosaic. To do this, you need to roll out a lot of "sausages" and leave them to dry overnight. In the morning, chips are cut from the "sausages" and again left overnight. Again in the morning, a layer of dough is rolled out, it is given the correct shape (circle or rectangle). Then the chips are inserted into the fresh dough so that there are indentations of them, and immediately removed. The chips are painted in different colors, after which both the layer and the chips are left to dry out.
Salted dough figurines can be decorated with rhinestones and beads.
This is not only a simple fun, but also a serious corrective lesson that allows you to develop the fine motor skills of babies, their perseverance, observation, creative imagination and educate their aesthetic tastes. And for adults, this is an excellent way to find peace and recover from the constant fuss, even if highly meaningful. And believe me: you just have to try it once - and you will surely grow to this art with all your heart. And let your creativity be your joy!
Crafts from salt dough photo
You can even make a pendant from the dough.
These are the decorations made from dough. who would have thought…
The best Christmas tree decoration.
You can make letters from the dough and string them into a bracelet.
You can make not only New Year's, but also autumn decor from the dough.
With the help of paint and dough ropes, you can easily sinter such a gold and silver heart.
Want a new ring? Make it with salted dough!
Cover the piece with a shiny varnish and you're done!
Adorable owl made of dough.
You can draw a penguin on the star.
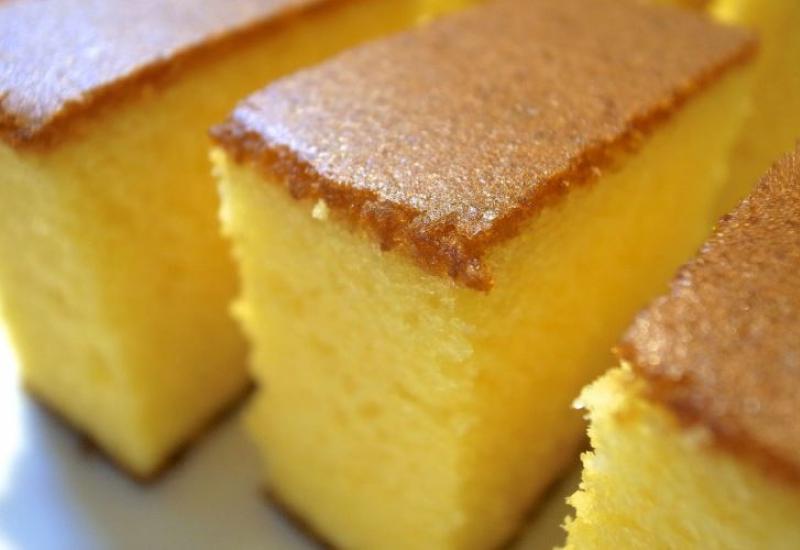
This is how the baking dough looks like; it will “brown” a little in the oven.
Shiny hearts on the Christmas tree.
Autumn crafts from the dough.
Crafts decorated with buttons.
And these are Easter crafts.
Salted dough flowers.
From the dough, you can make a memorable thing - your baby's palm print.
You can make balls from the dough and decorate with cereals.
Salted dough rose.
Christmas wreath made of dough.
Candlestick
You can make fruits and vegetables from the dough.
This article will show you how to make your own salted dough and how to dry it. A lot of photos and step-by-step instructions will help you mold a dough craft for any holiday.
For modeling lessons with young children, it is better to use salt dough or Play Dоh plasticine.
How to make craft dough: recipe
You can make the dough yourself, for this you only need a few simple ingredients: flour, fine salt, citric acid, vegetable oil and water.
First, mix 1 cup of flour with 0.5 cups of salt and 2 teaspoons of citric acid. Pour into a saucepan, add 1 tablespoon of oil to the dry mixture. Put on medium heat, gradually add water and stir. Water should leave no more than 0.5 cups. When the mass has lagged away from the sides of the pan and becomes one lump, remove the pan from the heat. Take out the mass, put it on a board, sprinkled with flour, and, like a regular dough, knead it with your hands.
If you want to make a colored modeling dough, you must first dilute the dry food coloring in the water. You can also add a little gouache to the finished dough and knead it well so that the color becomes uniform.
How to prepare salted modeling dough?
Make a salty dough. Paint it different colors, depending on what you want to dazzle. The dough can be made unpainted, divided into balls and in each add a little gouache of the desired color and knead. It is better to make the dough in regular colors, and then mix them to achieve the desired result.
Keep the dough in a bag, or wrap it in plastic wrap, you can put it in a closed container so that it does not dry out. If it is dry, add a little water, and if it is too wet, add a little flour.


- Thin the dough and simply spread it on the base of the craft, so you can make butter on a slice of bread, or make chocolate icing for a cake from brown dough.
- Try on the food you made with toy plates that you will play with later, so that they match in size
- Use a wet brush to stick the pieces of salt dough together. Smear the joint with a brush, and stick the pieces to each other.
- When sculpting food for dolls, it is very important to make the dough as much as possible in the same color as the original, for example, the carrots should be orange, not yellow or red
- To prevent the colors from fading, open the craft with varnish. For lessons with children, you need to use special harmless varnishes, they do not have an unpleasant odor, because they are water-based

Drying figurines from salt dough for modeling
There are two ways to dry salt dough crafts.
- Air dry the crafts. It is best if you place them on a smooth surface and leave them on for a few days. When the craft is dry, turn it over or lay it on its side to dry on all sides
- Baking in the oven. Preheat the oven well, put baking paper on a baking sheet, spread the crafts on top, put in the oven and turn off the heat. The oven must be closed and not opened until completely dry. You can also bake crafts at a temperature of 100 ° C, but in this case, you need to monitor them so that they do not burn.
These two methods can be combined, for example, dry for an hour in the oven, then leave in the air, after a while still in the oven, and so on until it dries.
Of course, if the craft contains other decorations (beads, beads), you need to dry it in the first way.
Christmas crafts from salt dough
The child will really like to decorate the house before the New Year and make DIY crafts with their parents.
Christmas tree toys made of dough

 Salted dough can be used to make great Christmas tree decorations, and even toddlers can handle making them.
- Prepare modeling dough in different colors or uncolored
- Roll a cake out of it and squeeze out a figurine, you can use cookie cutters
- Make a hole with a cocktail tube so that later the figurine can be hung on the tree
- Decorate the toy as you like with your child: stick multi-colored cakes on the Christmas tree, make a garland for it, let it rain, add white snow to the toy
- Unpainted dough can be dried first and then painted with paints or markers.
- Dry the dough or bake in the oven
- Pass the ribbon through the hole and hang the toy on the tree
You can make a lot of holes in the figures.


Or stick beads, beads and other beautiful stones into the dough, but in this case, these toys cannot be baked in the oven.


You can decorate toys with ribbons or decorative strings.

After the dough is dry, apply PVA glue on it and sprinkle glitter on the figures.


Use a permanent marker to color the uncolored dried dough.


Cut out a figurine in the shape of a mitten, make it a beautiful colored ribbon from colored dough and decorate it with a homemade button. This figurine can be baked in the oven.

Print the baby's palm and draw Santa Claus in it - it will not only be a wonderful toy for the New Year tree, but it will also be remembered.


You can also make such a Santa Claus toy. Use a garlic press to give him a beard. 

Make some more brown dough gingerbread toys like this.


Making a New Year's candle out of dough
To mold a New Year's candle, you will need dough for modeling in different colors, a cardboard cylinder, for example, from a roll of paper napkins and red and yellow napkins.
- Have your child roll up colorful sausages.
- Stick them over our cardboard base


- Decorate it with colorful balls
- You can simply stick around a cardboard cylinder with one color and then decorate it.


- Make a fire out of napkins and secure it at the top of our candle


Christmas tree made of dough
- First, make a blank for a Christmas tree, for this you need a cardboard box made of juice or milk. Cut off its top first, cut along the side folds, open. From the rectangles, you need to cut off the excess so that you get isosceles triangles. See how to do this in the diagram below.


- Glue the cardboard base for your tree


- Now let the child decorate it: let the green dough stick over it - you will have a Christmas tree. It remains only to add balls, a garland, a star to it, and do not forget about the gifts under the Christmas tree


You can also make such a Christmas tree


Easter crafts made from salt dough
For Easter, you can make the following crafts from salt dough:
- Decorated eggs made from tortilla dough


- Figurines of bunnies, carved from a cake of salt dough.
- Decorated voluminous Easter egg

- Egg stand


Easter eggs made from dough
Even a tiny one can cope with this task.
- Take the dough, mold an egg-shaped figure out of it.
- Decorate it as you like with your child.

You can use mixed dough of different colors for the base, you can make the base from unpainted and then paint with paints or markers. Crack eggs open with glue and sprinkle with cosmetic glitter. Glue colored balls by moistening the junction with a wet brush. Press beads, pasta, cereals, and other decorations into the eggs. Make prints with different objects.
In general, fantasize!

Dough egg stand
To do this, you will need a cardboard cylinder, dough and paints.
Cover a cut cardboard circle with unpainted dough, mold its tail, head and other parts, as shown in the diagrams below.


Don't forget to seal the dough all around the stand.


Decorate the craft as your fantasy tells you, you can use gouache or watercolors.

Open with water-based varnish to brighten colors and last longer.


Crafts from the test for February 14 for Valentine's Day
What do everyone associate with this wonderful holiday? Of course the heart! Let's make a festive heart with a child and give it to parents.
Salted dough heart


Here, as elsewhere, we first make the base, in our case the heart, and decorate it!


You can decorate with roses, it will be very beautiful. How to sculpt roses, see the step-by-step instructions with the photo below.

You can make such a strap with paws.


These cute couples are made very quickly and easily.


You can make many such heart-shaped figures, make holes in them and make a garland out of them, which you can use to decorate the wall in the house.

Photo frame made of dough
Make an empty heart, decorate it and use it as a frame for a family photo, secure it on the back with colored cardboard.


Salted dough decoration
Such a loving fish will definitely suit mother's outfit on this holiday.


Crafts from the test for March 8
On March 8, you can make such flower keychains for mothers, grandmothers, aunts and sisters. They can be done with younger children. You can use multi-colored dough or unpainted, and then decorate it with paints.

You can dazzle such a flower candlestick for a gift.

Make such interesting medals with the children, and most importantly, they are all different. Let the child give them himself.

Blind figurines in the shape of a figure eight and decorate with flowers, stones, beads, in general, for which there is enough imagination.

Make a pendant with your child, for example, in the shape of a heart and decorate it: blind flowers, leaves, decorate with paints, sign a congratulation.


Salted dough roses
- We take the dough for modeling you need colors
- Sculpt a cone


- Roll up the ball, flatten it gently into a round cake
- Glue the ball to the cone


- We make a second ball and glue it on the other side - we got a bud
- We make a few more balls and also sculpt petals from them. We cling them in a circle


- Bend the upper edges of the petals back a little, and press the sides to the center

- We make a few side by side, depending on how lush you want to get a flower
The rosette is ready!

 If necessary, make leaves of green dough, push the veins with a toothpick. Make the legs from the sausages. Connect all the details in one flower.
Crafts from the dough by February 23


Such a medal will definitely please.


Airplane - craft from salt dough
An airplane made of salt dough will be a wonderful gift for dad or grandfather.
- Roll up the base for the figure - this will be the body
- Bend one side of it a little - this will be the tail. Attach the remaining parts to it


- Roll up the wheels for him and fenders


- Go through with a damp brush and attach the parts to the body


- Blind and attach the wings in the form of triangles on toothpicks


- Make a propeller and use a toothpick to attach to the body as well

- Let the figurine dry for a few days.


- Decorate the airplane with gouache


Crafts from the dough for Shrovetide
Shrovetide is an ancient holiday with many symbols and traditions. Crafts for this holiday are very diverse, you have plenty to choose from.
For the little ones, you can offer to make the sun, which symbolizes the onset of spring.

 Here is such a sun for older children.
 Have your child make their own pancakes using salted dough.

 Pancakes key chains

Panels and pictures from salt dough
With older children, you can make a picture of salt dough.
For example, it could be a fruit basket. Follow the step by step instructions from the photo below.
- Roll out the uncolored dough to a thickness of about 0.5 cm
- Prepare a basket template and, attaching it to the dough, cut out the basket from it
- Squeeze out the dough using a garlic press, twist it into flagella, stick it, having moistened the junction before this, on the handle of your future basket.


- Use a stack or knife to push through the lines that simulate basket weaving


- Squeeze out from the rolled dough with a mold or cut out a few leaves according to the template. Sell them veins
- Stick the leaves on the basket


- Now prepare the fruits: apples, plums, grapes, etc. Roll balls of different sizes for them and give them the desired shape. For apples, in the place where the dried inflorescence should have been, stick the seasoning with cloves, the apples will look like real
- Put it all together in one picture


- Leave your craft to dry for a few days, preferably naturally.
- Color at your discretion
Here is a simpler picture you can make with smaller children.
- Draw a background to it
- Draw the outlines of the character shapes
- Ask your child to stick the dough without going out of the way
- Leave the painting to dry
- When it's dry, invite your child to paint the characters.
- Draw small details
- Open the picture with varnish, put it in a frame and you can hang it on the wall


Step-by-step dough crafts
Below are some step-by-step instructions with a photo for sculpting salt dough with children.
Salted dough beads
- We take colored dough, you can have the same color, you can different
- We roll balls from it, preferably evenly and of the same size. You can make the size in descending order
- Pierce the balls gently in the center with a toothpick
- We leave them to air dry for several days. Flip them periodically on opposite sides.
- When the balls are dry, carefully remove the toothpicks
- We string the resulting beads on a string or ribbon
- You can paint the beads with paints or markers


Salt dough horseshoe
- Roll out the dough into a flat cake, 1 cm thick
- Attach a horseshoe template and cut out a figurine with a knife
- Blind the leaves, cut off the excess, push the veins on them
- Blind the berries and the flower, make holes in the berries and stripes on the flower with a toothpick
- Lubricate the horseshoe with water and stick all the details
- Use a toothpick to make holes around the horseshoe. Make two holes through the top to hang the figurine on the string
- Leave the horseshoe to dry completely or bake in the oven
- Initially, the dough can be taken in a certain color for each detail, or you can decorate it with paints at the end.

Dough star
- Roll out the dough into a layer about 1 cm thick
- Cut out an asterisk or other figurine with a cookie cutter
- Lubricate the corners gently with a wet finger so that they are smooth
- We decorate the figurine: we make her eyes, mouth, nose, pierce the holes with a toothpick, add decorations
- Bake in the oven or air dry
- We open with varnish

Dough caterpillar
- Roll the green dough sausage
- We cut it into equal circles, roll balls from them
- We mold the balls together, do not forget to moisten the junction.
- Making a caterpillar's face
- We pierce the figure with a toothpick or a pin in the place where we will attach it to the ring
- We dry our craft

Salted dough apple
- Roll out a ball of dough in the form of half an apple. To make the cut even, press it down to some smooth surface.
- Add a flat white center
- Roll apple seeds and a tail from brown dough. We make leaves from green
- Putting the figurine together and drying it


Crafts from salt dough - hedgehog
- Form the body and head of a hedgehog from unpainted dough


- Make him a nose and eyes, you can use black dough or peppercorns


- Use nail scissors to cut the dough, making needles, lift them up a little. Cut the second row in a checkerboard pattern, and so on until the end


- Leave the hedgehog to dry. When it completely hardens, you can paint it with paints and sprinkle with varnish.

Salt dough crafts - animals
Many animals can be sculpted from salt dough with children. Below are some step-by-step instructions with a photo.
Dough lamb
- Roll 4 balls - these will be the legs of the lamb. Place them in a square, pressing them tightly against each other (look at the photo)
- Roll up a piece of foil and place it inside the dough. Roll a ball out of it - this will be the body of a lamb
- Add the lamb's head, blind eye balls, sausage horns and ears
- To simulate wool, make many small balls and stick them around the back of the figure, pressing them down a little.
- Dry your craft and paint with paints and / or markers


Salted dough owl
- Roll out the dough into a round tortilla
- Use a felt-tip pen cap to push in waves, imitating plumage
- Roll your sides inward - these will be the wings
- Wrap the upper part towards the center too, stretching a little on the sides - this will be the head and ears
- Stamp with an eye cap and a toothpick add a beak
- Dry and paint


Dough elephant
- Roll the ball, stretch it a little - this will be the body of an elephant
- Make 4 thick sausages - these will be the legs
- Blind the trunk of another
- Make a tail from a thin sausage
- Roll out two cakes, put on them smaller diameter and pink plates - you will get ears
- Collect everything in one figure and do not forget about the eyes
- Dry the elephant and open it with varnish


Dough crafts - cat
- Cut out the cat template from cardboard


- Roll out the dough in a layer of 0.5 cm
- Attach the template and cut the cat out of the dough

- Let the dough dry
- Using sandpaper, sand around the perimeter of the figurine.


Paint the cat with a pencil and then paint, let it dry


Frame the panel


We make a fish from salted dough
- Roll out the dough 0.5 to 1 cm thick
- Cut the fish according to the template
- Decorate it: make voluminous eyes, fins and a tail, imitate scales with caps from felt-tip pens or other improvised means
Let the mushroom dry and color it


Dough crafts - fruits and vegetables
From salt dough, you can mold many different vegetables and fruits, with which you can then play and feed the dolls.
Remember that the colors of the food for the dolls should be matched as closely as possible to the original ones.

Following the step-by-step instructions and photos, you can mold interesting figurines from salt dough, which can then be presented to friends and family for different holidays. We hope in this article you have found a lot of interesting works and useful information. Enjoy your activities and beautiful crafts!
VIDEO: Craft from salted dough "Owl"
Easter crafts made of salted dough are able to decorate the Easter holiday in the best way, make it warm and joyful. An Easter egg made from salted dough on a stand will best help convey the mood of this wonderful holiday. Crafts from the dough do not take much time to make them, and the pleasure of sculpting and coloring simply cannot be conveyed. The kids are delighted, and so are the parents!
Crafts from salt dough: DIY Easter eggs
The master class of this craft will allow you to cope with the task without difficulty.
You can, of course, roll the whole egg out of the dough. Only it will dry for a very long time, it is rather heavy and can crack and swell when dry. Salted dough gives a good result if its thickness in the product does not exceed 7 cm.
Therefore, it is best to make Easter eggs - dummies on a frame. In this case, the best option is an empty eggshell. To prepare it, you need to make two small holes in a raw egg with a sharp object - you can use a darning needle, or the tip of a knife. The inside of the egg is blown onto a plate for use in food later.

Now you should start preparing the mass for modeling. A cup of ordinary flour (without impurities), half a cup of finely ground salt are poured into a bowl, mixed. Water is gradually added to the mixture, and everything is immediately mixed. Then the dough is kneaded on the table. It should have the consistency of dumplings.

An empty shell is placed on a rolled pancake.

Then the whole frame is wrapped in the dough, the seams are smoothed with fingers soaked in water, the surface is leveled by rolling the egg on the table. At one end, a puncture should be made in the dough shell in the place where the shell has a hole, otherwise, during baking, the air that has increased in volume from heating will give an ugly swelling. 
Letters, flowers, berries, leaves are cut out of a thinly rolled piece for modeling mass with a sharp knife - everything that the master's fantasy tells. Having moistened the side of the future bas-relief with water, which will attach it to the main part, the sculptor carefully applies the applique in the right place. With fingers dipped in water, carefully smoothes the seams so that there are no cracks.
You can emphasize the border of the bas-relief using a knife. The point should be applied with the flat side - the sharp part should be directed directly to the line where the bas-relief rises above the plane.

You can bake an egg in a conventional oven, but it is preferable to do it in a "microwave". The mode should be set to "defrost", the time is 1 minute. This will be a test firing. To prevent the egg from warping, it is best to put it in a bowl of flour. Then, in the place of contact with the plane, no dents are formed on the egg.
After checking, you can make a putty: fill up the resulting irregularities and cracks with pieces of wet dough. If, nevertheless, swellings have formed, they can still be cut off with a knife or scissors in order to cover the place of "repair" with a wet mass.
Now you can "burn" the egg in the microwave oven in the usual way, but it is better to do it in several steps for 2 minutes, each time checking the result.
After "baking" the egg is painted with watercolors, acrylics or gouache. After drying, you can cover the product with ordinary colorless wood varnish or sprinkle with hairspray.
Modeling on the theme "Easter" involves the implementation of an egg stand. The stand is most conveniently done in three steps. A cup should be formed first. For her, the master can take a plastic cap from an air freshener or dichlorvos. First, it must be greased with oil: petroleum jelly, sunflower, margarine. Then you need to carefully stick it with a thin layer of rolled dough, smooth out the joints. 
After distributing the dough in an even layer, you need to cut off the excess with scissors. The lid should protrude slightly above the dough. Along the edge of the "glass" it is allowed to make a "roller", you can decorate the stand with a bas-relief.
The "Cup" can now be placed in the oven upside down. After 1 minute of "baking" in the "defrost" mode, the part is removed from the cabinet, and the lid-breadboard can be easily removed. 
The leg is rolled out of a small piece of dough, attached with a moistened end to the bottom of the cup, the place of attachment is smoothed with wet fingers. The part is again placed in the oven, which is switched on for "defrosting". The part should be placed upside down, "bake" for a minute. 
For stability to the leg of the stand, attach a metal cover covered with dough. Do not forget to moisten the attachment point, and gently smooth the seams! It is better to dry the product for the first time upside down. 
After the last baking (at normal temperature), the glass stand is painted with watercolors, gouache or acrylics and varnished.
This decoration can last as long as you like: a year, two or longer. But remember that this product is fragile and should not be dropped. And it is not recommended to wash an egg with a stand with water.